Brigham Hill Community Farm
37 Wheeler Road
North Grafton, MA 01536
Brigham Hill Community Farm
37 Wheeler Road
North Grafton, MA 01536
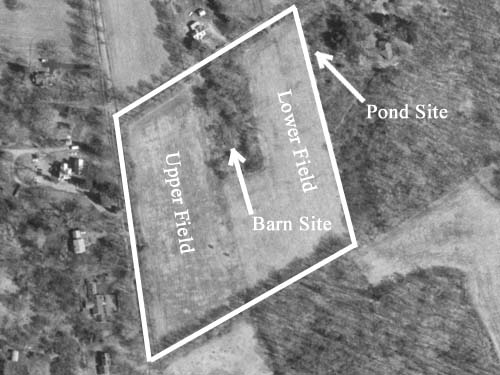
Follow our work in 2001-2002, as we planted our fields and watched the Brigham Hill Community Barn take form.


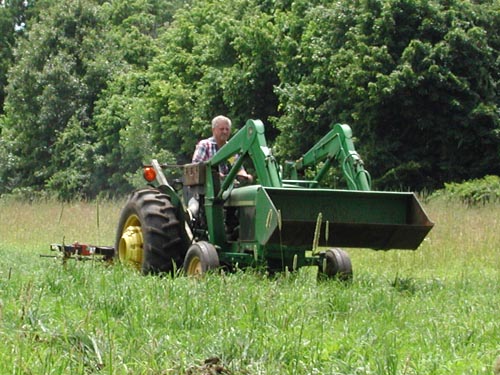
Clark Nicklow prepares the upper portion of the field for the next year, by using a disc harrow to loosen the soil. Buckwheat is then planted as a cover crop, which doesn't form the dense root structure associated with sod. This will make the land more tillable and help the crops grow better next year.
Clearing begins in a wooded area that juts into the field. This is where the new barn will be sited. Mechanized equipment is used that can grab an entire tree, cut it off at the base with a built-in saw, then carry the tree away in a matter of seconds. The wood is then chipped on site, and trucked away to a power plant in northern Worcester County where it is used for fuel.
Trees to be retained were carefully selected by an arborist beforehand and marked with a ribbon. These will now grow larger because they are no longer competing for light with surrounding trees.
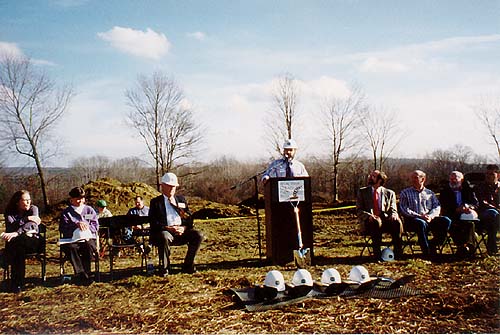 photo by Jan Ronfeld
Groundbreaking! On an amazingly beautiful December day, reaching 70 degrees with a gentle breeze, our groundbreaking ceremony for the new barn drew a crowd of 70 people. Speakers included (left to right in picture above):
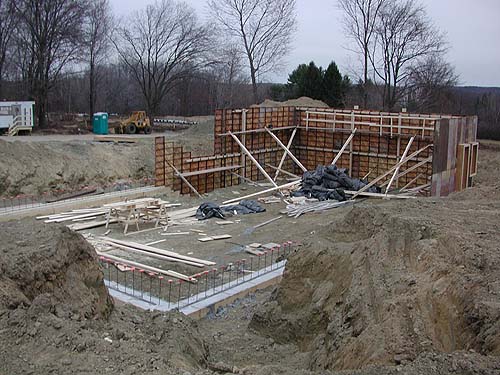


The foundation hole is excavated for the new barn, and a concrete footing is poured. Then, concrete forms are erected that will shape the inside of the concrete foundation. Wherever a door or window will be needed, a wooden form is attached that will create a hole through the concrete.
Then, steel reinforcing rods are placed so they will become embedded in the concrete and lend strength to the foundation. Then, more concrete forms will be placed to form the outer wall of the foundation.
Also at this time, concrete drain pipe is delivered that will become part of the drainage system for rain water that runs off the property. This will be channelled down into the farm pond for use in irrigation.

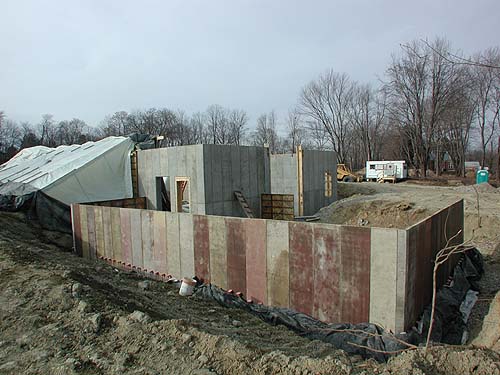
After the sandwich of inner and outer concrete forms, with reinforcing rods in between, has been erected around part of the foundation, the concrete is poured. Blankets are used to hold in the heat given off by the curing concrete -- this prevents the concrete from freezing in the cold weather and losing some of its strength.
Only half of the foundation is poured at a time. This is because the concrete forms are rented, and it is less expensive to use fewer of them and use them over once the first half is cured.
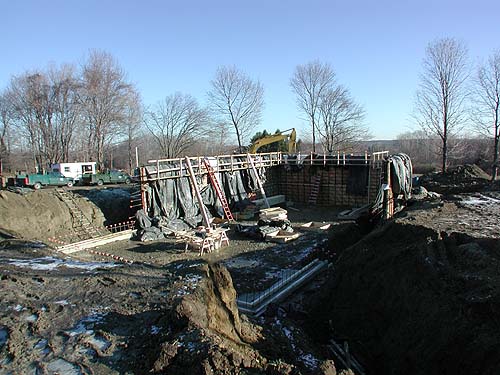
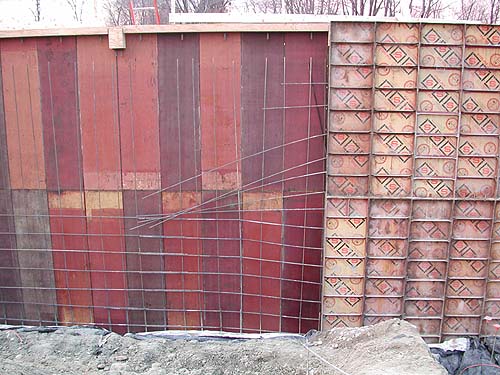
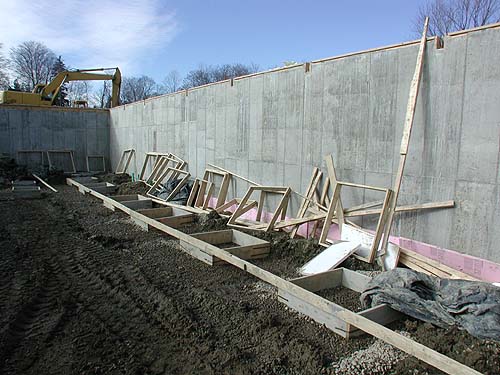
The concrete forms are now being moved to the second half of the foundation. Note that the inner forms are now in place, waiting for the reinforcing bars to be installed before the outer forms are moved into position.
You can also see in the second picture where the gap was left in the foundation for the barn's large doorway for drive-in access.

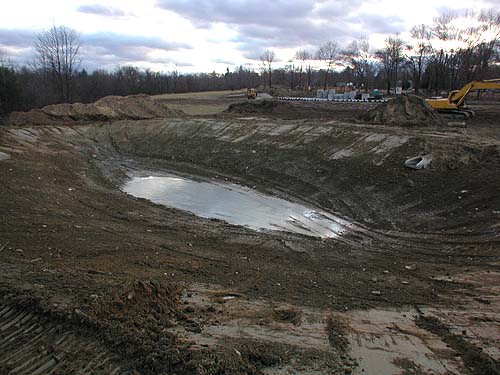
The farm pond that will collect runoff water for irrigation is also being formed at this time. Here, an excavator rests after shaping the pond's forebay. This smaller pond allows sediment to settle out of the water before the water passes into the larger pond to the rear.
The larger pond is already collecting water, but this is due to water seeping in from the water table in the surrounding earth, perhaps joined by a bit of melting snow.


Meanwhile, another company is clearing away a tangle of vines and smaller trees that were beginning to encroach on the field. The result is a more regular row of trees lining the roadway, carefully selected by an arborist for variety, health and other factors. Neighbors along North Brigham Hill Road now have an uninterrupted vista across the field, and you can once again see the White's farm from the field.
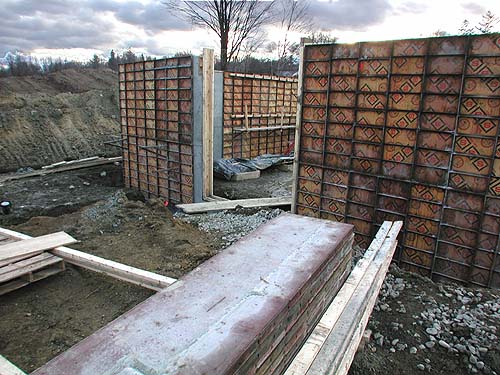
Here you can see the footing for the greenhouse at one end of the barn. The reinforcing rods poking up will become part of the foundation wall for the greenhouse when the concrete for that wall is poured.
In the center picture you can see the reinforcing bars being put in place in between the concrete forms. These will end up embedded in the concrete after it is poured.
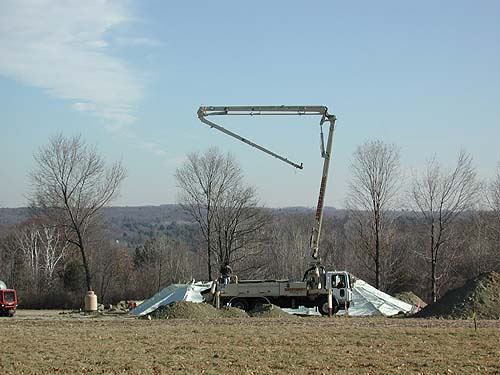
On the day when the second half of the foundation is to be poured, a truck maneuvers a long boom that will carry the concrete mixture into place. Notice that the foundation has a tent made of plastic sheets around it - a propane heater is used under this tent to keep the concrete warm while it is curing to avoid freezing that would damage the concrete when it is still wet.
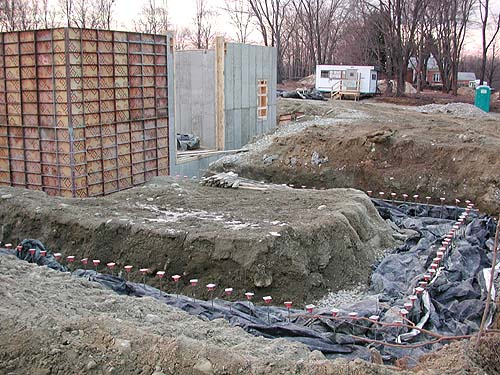
Now the inner form for the concrete foundation wall of the greenhouse is put into place. Again, reinforcing bars will be installed, then the outer forms will be assembled prior to pouring the concrete. In the background, you can see the plastic tent that is keeping part of the main foundation warm as it finishes curing.
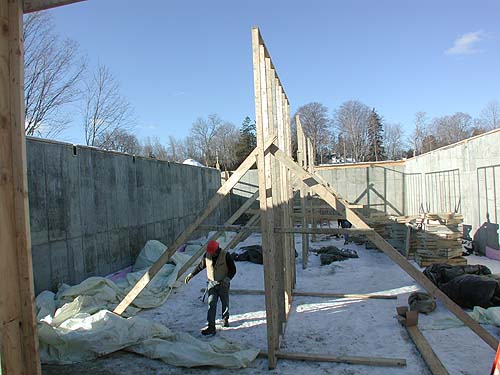
Inside the foundation, a wooden framework is erected over which a large plastic tent will be stretched. The propane heater will again be put to work to thaw out the ice and snow inside the structure so more work can be done.
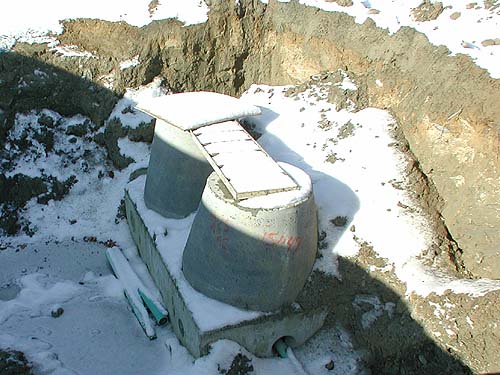
Just outside, a large hole is excavated to hold the grease trap. This large (about 6 feet long) structure is required by town regulations because of the commercial kitchen that will be in the barn. It will keep kitchen grease from flowing out into the town sewer system. We hope we'll remember to clean it out!
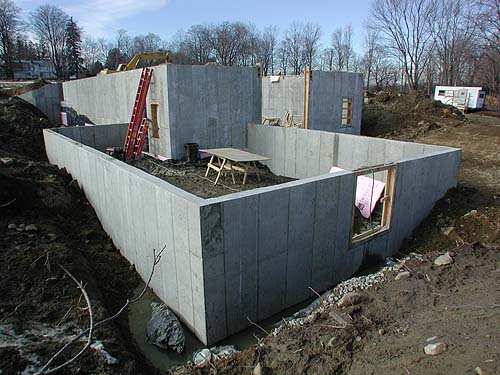

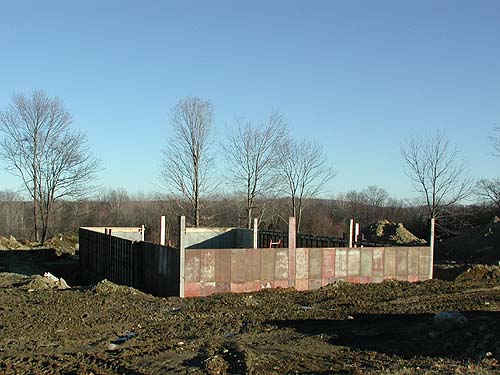
With the concrete poured and the forms removed, the foundation wall of the greenhouse appears. Looks pretty good! We later decided that the doorway should be wider, so a concrete saw will be used to cut a bigger opening.
On the main foundation, a waterproofing material is glued to the concrete to keep water from seeping into the lower level. With this material in place, the dirt can be pushed back against the foundation wall.
Inside the structure, square wooden forms are put in place to pour concrete pads that will be the footings for support columns. Notice the notches at the top of the foundation wall where the steel beams will sit.
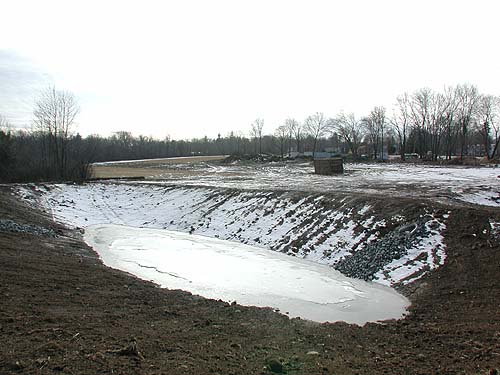
Meanwhile, the pond continues to slowly fill up with natural seepage of ground and surface water. You can see the barn site in the wooded area in the upper right side of the picture.
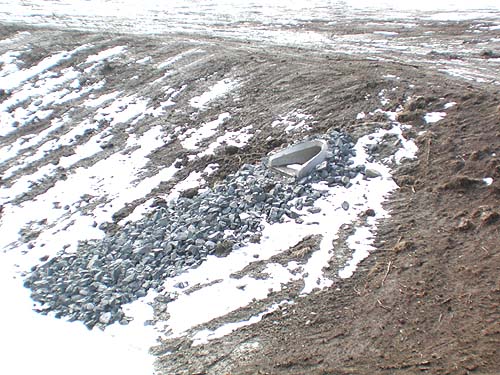
The drainage system is now in place to feed the pond. Where it spills into the pond, a pile of rough stones called "riprap" has been placed to keep the dirt from eroding and slow down the water.
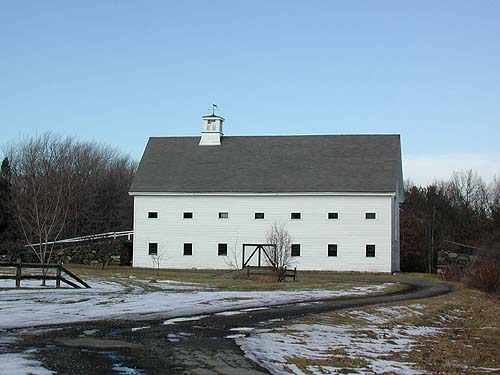
No, the barn isn't finished yet... this is the White's barn across the street!

A new piece of equipment appears on site: a crane!
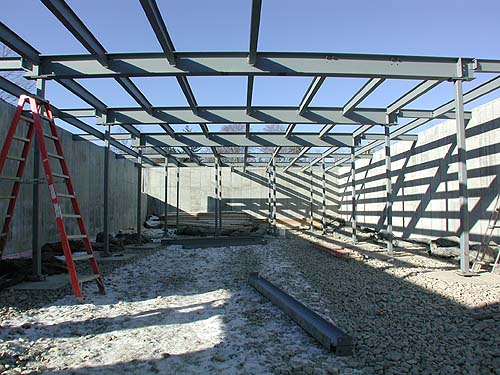
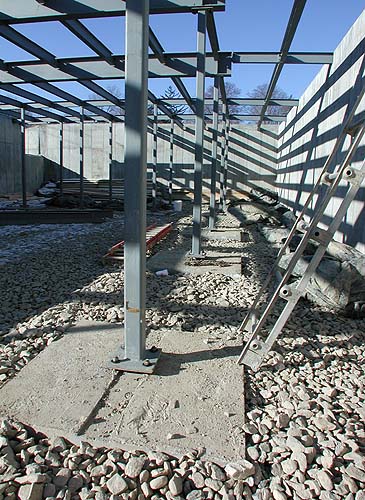
With the foundation walls complete, steel beams are placed across the top of the concrete walls, supported by steel columns that are seated on concrete pads. This steel structure will help support the "post and beam" timber frame that will be the support structure for the upper two floors.
Of course, older barns would have been constructed entirely of wood, perhaps with a granite foundation. But the use of modern materials for the first floor helps us achieve more clear space in the equipment storage area and reduce cost.
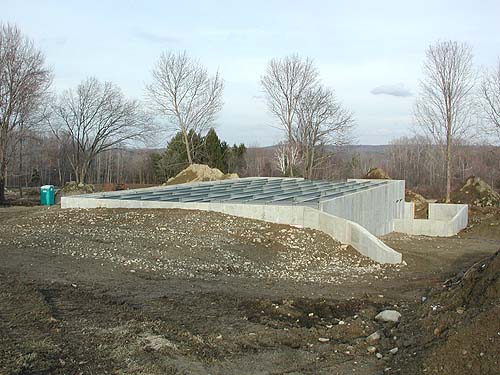
Work slows down at the site as the weather gets colder. The earth around the foundation is graded to near the final level, and the site is cleaned up a bit in preparation for a short winter shut down. Fortunately, the weather was very mild this winter and work could progress through January and early February.
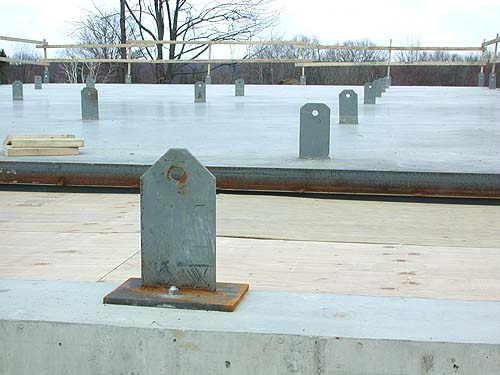
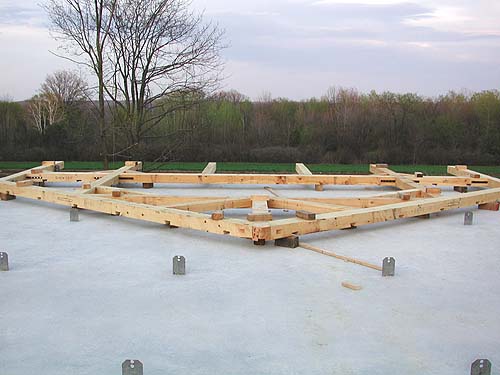
The site comes alive again as work commences in preparation for the arrival of the timber frame. A corrugated steel deck is attached to the steel beams, forming the floor of the main level. Then, a layer of concrete is poured on the steel.
The metal tabs you see protruding from the concrete are attached to the steel underneath, and will be used to secure the timber frame to the rest of the structure. The tabs will be inserted into slots cut in the bottom of each wooden post.
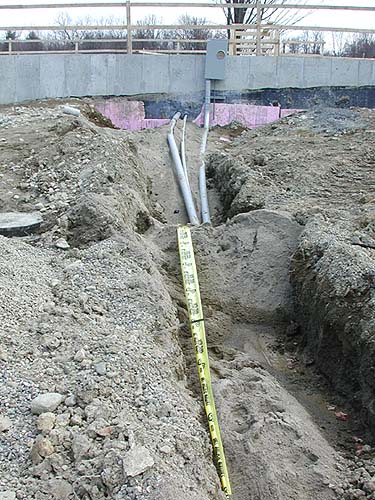
At this time a trench is dug from the barn out to the roadway, underneath where the driveway will be. This trench carries an electrical conduit, a 4 inch water line for the sprinkler system (for fire prevention), and a 2 inch water line for service to the building and for backup for our irrigation well.
Notice the yellow tape that is buried above these lines. It says "Caution, Electric Line Buried Below". A clever idea!
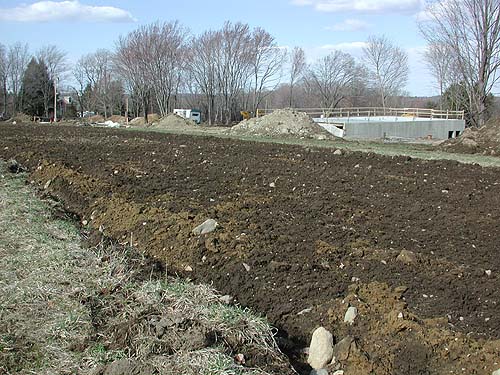
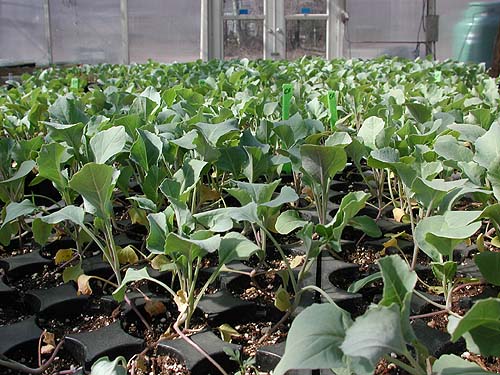
The field that Clark prepared last summer has now been plowed again in preparation for planting later this month. Meanwhile, back at the greenhouse at Elmwood Farm in Hopkinton, broccoli, cauliflower and cabbage seedlings are getting near to the size where they can be transplanted in the field.
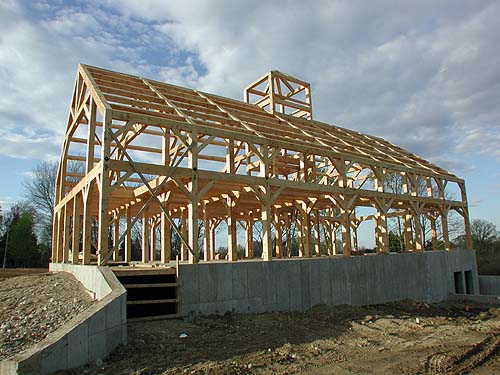
The timber frame goes up!
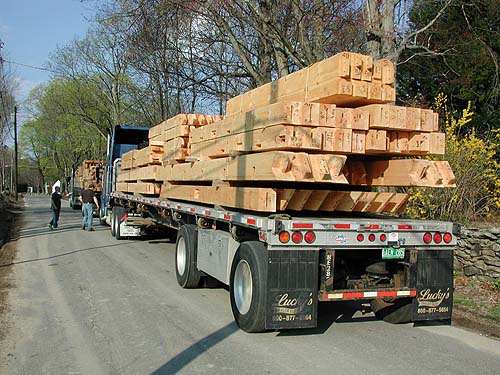
On Wednesday, April 17th the massive wood components of the post and beam frame arrive from Vermont Timber Works on two enormous flatbed trucks. Portions of the stone walls along the road have to be disassembed to allow the trucks to make the turn into the site.
The crew from Vermont Timber Works goes to work building the first section (or "bent", as it is called) of the frame. These are assembled horizontally on the first floor deck, in order to make the work easier.
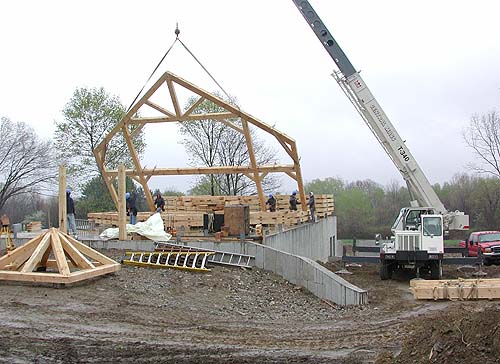
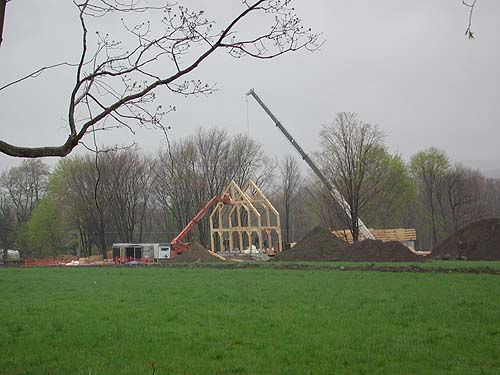
So this is when all the neighbors get together and hoist the frame into position, right? Well, not exactly... Once the bents are all assembled, a crane comes on site to do the work of guiding the bents into place. Workers at each post carefully position the posts so that the slots on the ends of the posts glide into position over the steel tabs protruding from the floor deck.
When the first bent is in position, a machine that looks like a fork lift with an extended lift arm is used to hold the bent in place as a second bent is brought into position. These are then connected together with other wooden beams to provide stability. When several bents are in place, the structure is stable enough to stand on its own.
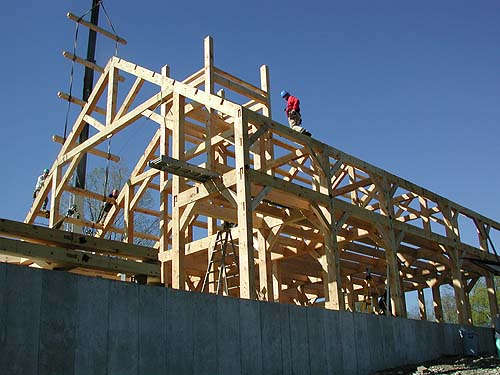
The roof timbers, called "purlins", are hoisted into place in groups to save time. Straps are used to temporarily connect them together, then the crane lifts all of them at once for a section. Workers on the roof guide them into place as the crane lowers them.
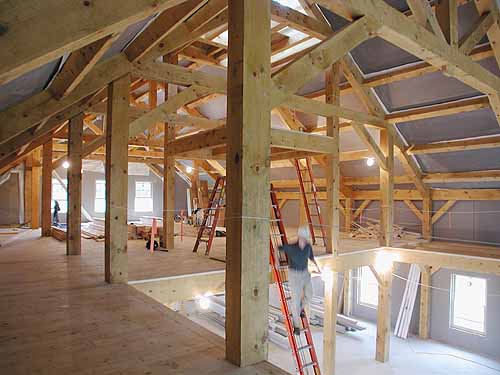
At the end of the seventh day, the complete structure stands on the landscape in all its magnificence! Some of the beams are as large as 8 by 14 inches. It is quite an experience to stand inside the structure.

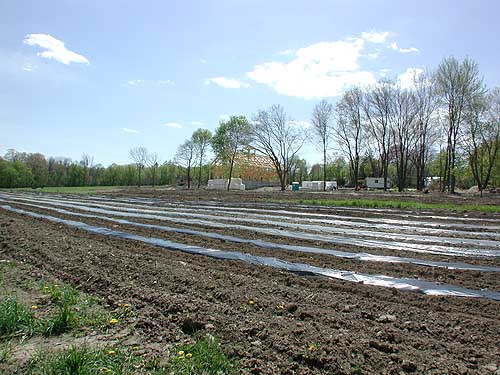
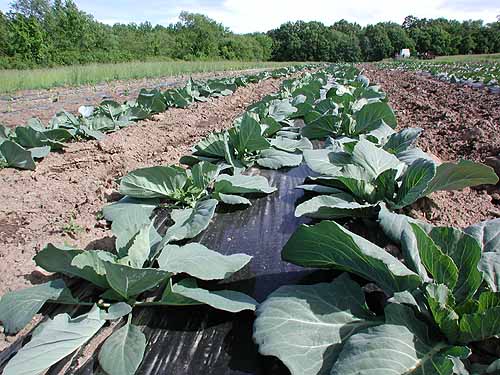
The fields are prepared for planting by laying strips of plastic sheeting as a form of mulch along the crop rows. This is, in part, a water conservation measure, as the evaporative loss will be much less using this method. A "drip tape" is placed underneath each strip of plastic for irrigation - this will be used later in the season when the weather begins to get dry. The tape is like a flat garden hose with tiny outlets every few inches to let a controlled amount of water escape.
Even though it is still early in the New England planting season, volunteers have already begun to plant seedlings of such hardy plants as cabbage, brocolli and cauliflower. Around us, the meadows and forests are beginning to turn green with the advent of spring.

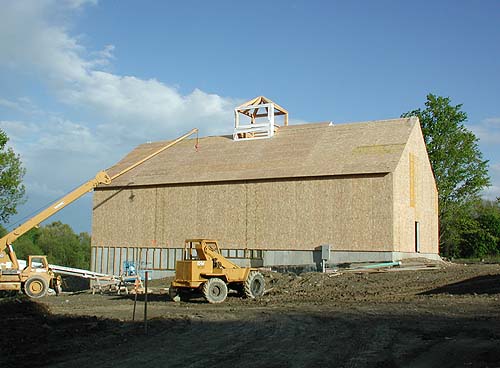
The barn is also going through a transformation, as the panels are put into place that will make up the sides and roof of the structure. A technique called "stress skin" panelling is being used - these panels are a sandwich of composite board, foam insulation and gypsum board. When put in place, the panel forms the outer sheathing, the insulation and the inner wall, all in one operation.
All that is left to complete the walls is to attach the clapboards to the outside, and tape and paint the inside. Note the wood strips attached to part of the foundation wall - these will allow clapboards to be attached to that part of the foundation. The barn looks quite different than it did two weeks ago!
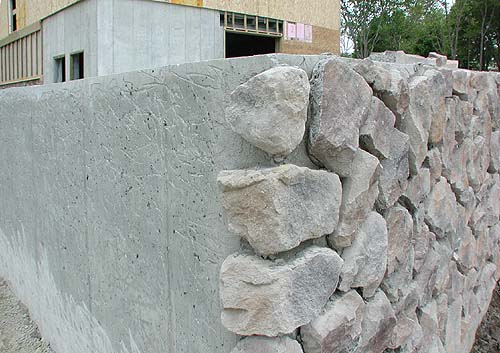
And now, is it real, or is it... concrete??? In a compromise of efficiency, appearance and cost, a finish known as "cultured stone" - actually concrete - is applied to the outside of the exposed foundation wall. With the appearance of a traditional stone foundation, this surface economically conceals the concrete foundation underneath. The underlying concrete foundation will provide the necessary strength and water resistance for a long-lasting and dry lower level.
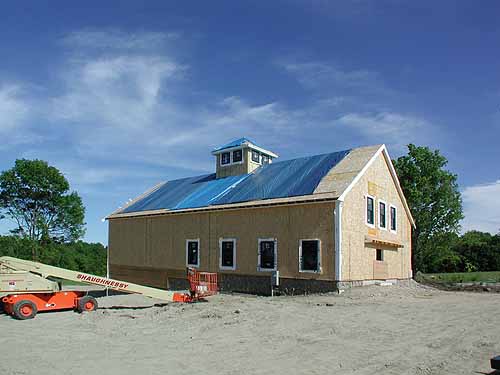


As the cabbage grows down in the field, the barn begins to gain its final appearance. Windows are installed through the stress skin panels, and clapboards are applied, precoated with a gray primer. Tarpaulins cover the roof to keep the rain out until the shingles are applied.
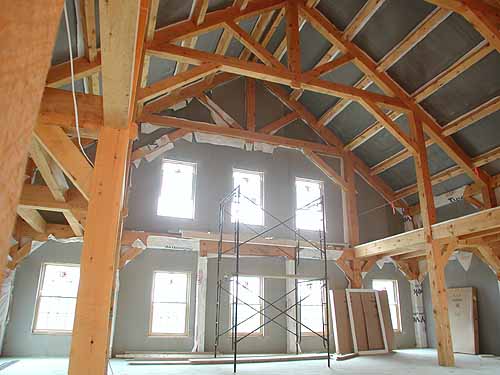
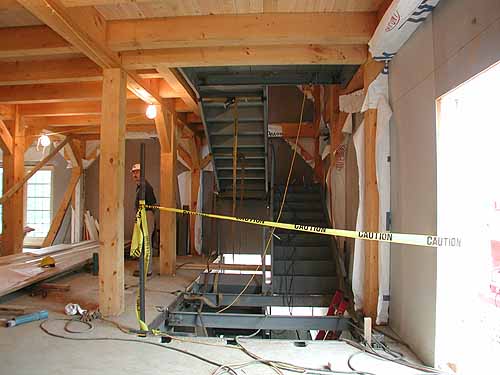
Inside, the barn takes on the character of a cathedral, with light streaming in to illuminate the exposed beams. On the upper storage level, floor decking is installed to provide a surface to walk on. A metal stairway is installed at this time, too. In the lower level, framing is installed for the mechanical, electrical and communications rooms, as well as the stairwell.
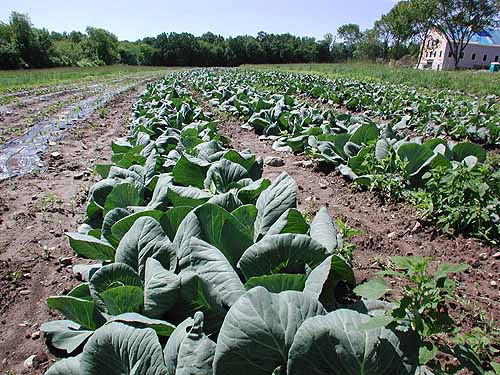
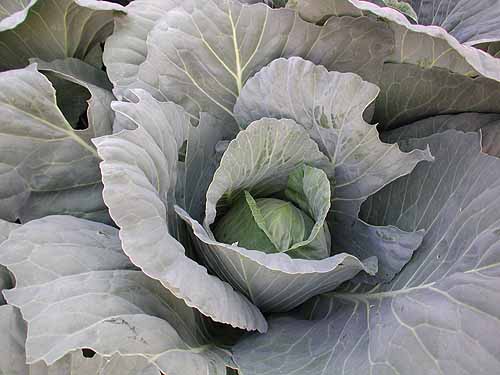
The cabbage continues to grow, but now so do the weeds! Time to get back out in the fields to cultivate!
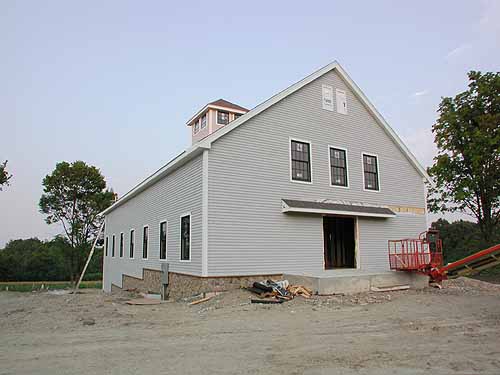

The exterior of the barn moves toward completion, as details are attended to prior to painting. Although it can't be seen in this picture, the shingles have now been installed on the roof.
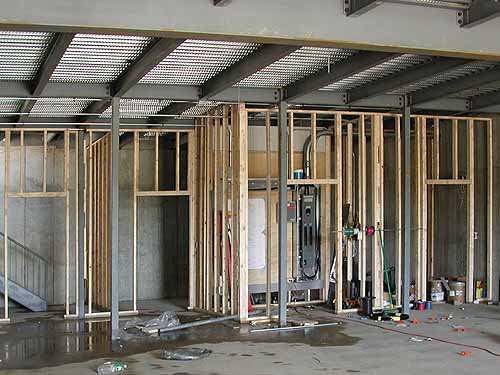
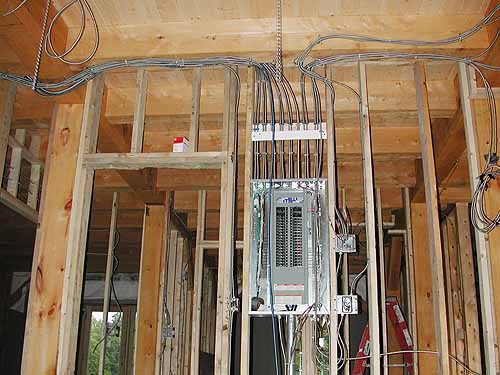
The focus of the work turns inward now, with carpentry, electrical work and planning for the plumbing and HVAC (Heating, Ventilating and Air Conditioning) system all moving in parallel. The electrical sub-panel for the kitchen is installed, and the wiring is run to individual electrical outlets in the walls.
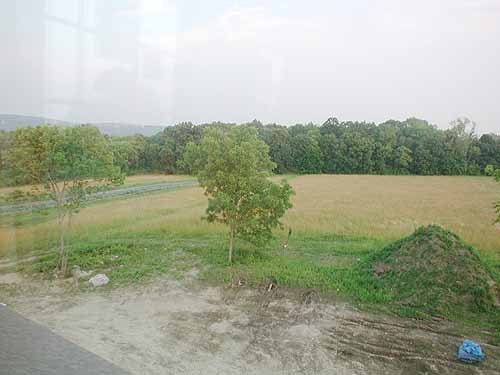
The floor of the cupola is now in place and, after climbing up a series of ladders, you can see expansive views of the fields and the scenery beyond. Meanwhile, the crops keep growing, and some are even ready for an early harvest!

The Middlesex School visits and harvests 1570 pounds of tomatoes and peppers, as the barn, then still under construction, takes form in the background. By the time the season is over, 24,624 pounds of vegetables were harvested from the Grafton farm in 2002. The barn's grand opening, on November 3, 2002, is a celebration of multiple harvests, and the promise of many more to come.
To see the current harvest of Community Harvest Project at the Brigham Hill Community Farm, visit the CHP website.